


Turn over a piece of Arita ware and look at the name on its base. It may identify the kiln. It rarely names the clay maker, the people who shaped and finished the body, or the painter working in a separate studio.
In June 2026, our team spent two days following that work in and around Arita: from a clay works to casting and roller-forming workshops, a painting kiln and an overglaze painter’s home studio. At one stop there were heaps of stone; at another, rows of soft cups; at the last, a brush touching a lid no bigger than a coin.
Here is the journey from stone to table, with links to our five workshop reports along the way.
How is Arita ware made?
Arita ware begins with a prepared porcelain body, often made from pottery stone. It is shaped, finished and dried, then typically bisque fired at about 900°C (1,650°F). For blue-and-white ware, cobalt decoration is added before glazing and a main firing around 1,300°C (2,370°F). Overglaze enamels, when used, are applied afterward and fixed in further, lower-temperature firings.
Arita’s system of bungyō (分業), or division of labor, connects these specialists. Some work within a single producer; others run independent workshops.
What is Arita ware, and how does it relate to Imari?
Arita ware, or Arita-yaki (有田焼), is porcelain associated with Arita in Saga Prefecture, on Japan’s island of Kyushu. It belongs to Japan’s earliest porcelain-producing tradition. The Kyushu Ceramic Museum traces the beginnings to pottery-stone discoveries in the 1610s; local tradition credits the Korean potter Kanagae Sambe’e, also known as Ri Sampei, with finding the Izumiyama deposits in 1616.
Historically, porcelain from Arita and neighboring areas was shipped through Imari port, giving it the name Imari ware. Today, Imari can also refer to ceramics made in Imari itself, or to a decorative tradition familiar from export porcelain.
The longer history is in our introduction to Arita ware.
Stage 1: Turning pottery stone into porcelain clay
At Koda Toudo in Ureshino, the first material we saw was rock. Amakusa pottery stone, quarried in Kumamoto Prefecture, supplies many porcelain makers in Arita and the wider Hizen region. Its minerals are already there, waiting to be refined into a workable body.

Workers wash the stone and chip away iron-stained areas with hammers. Cleaned pieces pass through a crusher and then a stamp mill. Koda Toudo describes about thirteen hours of milling before the powder is mixed with water, refined and sieved.
A filter press squeezes out water, leaving damp slabs. A vacuum pug mill helps remove trapped air and prepares the clay for forming. It emerges as a smooth cylinder, then is wrapped to keep it workable.


Removing impurities helps prevent discoloration and unwanted specks in a white body. From here, preparation depends on the forming method: a casting workshop needs fluid slip; a roller machine needs soft, solid clay.
Follow the material in our visit to Koda Toudo, from Amakusa stone to porcelain clay.
Stage 2: Designing the shape and making the molds
A cup’s rim, walls, foot and balance are decided before production begins. For mold-based work, a model is developed and copied through a succession of molds to produce the working plaster molds used on the floor.
Models can be made by hand or with computer-controlled equipment. Working plaster molds wear and need replacing; an accurate master lets the workshop reproduce the design.

The tooling also allows for drying and firing shrinkage. That allowance is worked out for the particular clay and process.
For the model-making background to the molds we saw, we draw on the regional cooperative’s account of forming.
Stage 3: Forming, finishing and drying
Forming, or seikei (成形), gives the clay its shape. We watched two quite different ways of doing it.
Casting with liquid slip
In the casting workshop in Yamauchi, near Arita, clay was prepared as a fluid slip and fed into plaster molds. The plaster draws water from the slip, allowing the body to firm up. We watched flower-shaped plates being released from a stack of molds held in a press.


The craftsman lifted a long board of unfired plates onto his shoulder and carried it through the workshop. The plates already had their familiar outline, but they were still soft enough to demand this careful handling.
The full casting-workshop report explains the mold handling, seams and drying in more detail.
Roller forming with soft clay
At Kanezen, the clay went into the mold as a measured, soft section. A rotating metal head pressed it against the plaster to form the inside of a tumbler. The operator loaded and removed the molds between cycles.

Roller forming is one way to repeat round shapes. Hand throwing and the machine wheel offer others. The choice depends on the design and the workshop; the finished shape alone cannot tell you which was used.
See the roller-forming floor at Kanezen for the sequence in motion.
The work between forming and firing
After forming, seams, rims and feet need finishing, and some designs need components attached. The pieces then dry before firing. Uneven drying can distort or crack them.
This is greenware: shaped, but still unfired.
Stage 4: Bisque firing, the first trip through the kiln
Dried pieces are given an initial firing called suyaki (素焼き), or bisque firing, commonly around 900°C. The body becomes easier to handle while retaining the absorbency needed for the next stages.
Stage 5: Painting beneath the glaze
At Sōta-gama, boards of bisque bowls stood beside the painters. At the end of a row sat one finished bowl, its fired pattern serving as a reference for those still to be painted.

For sometsuke (染付), or blue-and-white porcelain, the pigment is cobalt-based gosu. It can look gray or brown before firing. Sen-gaki is the line work; dami is the wash that fills the outlined areas. A slender brush gives way to a fuller one that holds a reservoir of diluted pigment.
Bisque absorbs a mark almost on contact. The painter has little room to adjust a stroke once it touches the surface.
White porcelain skips this decoration. Blue patterns can also be applied with transfers or stamps; here, we watched the brushwork by hand.
Stage 6: Applying the glaze
At the glaze tub, the painted design disappeared beneath an opaque coating. After firing, the blue would show through again, beneath a glassy surface.
Glaze can be dipped or sprayed, and its application affects the finished surface. The part of the foot that touches the kiln support is wiped clean to prevent sticking.
That bare ring under a bowl is a trace of this step.
Stage 7: Main firing and controlled cooling
In the main firing, or honyaki (本焼き), the kiln reaches around 1,300°C. A glassy phase forms within the body as it becomes highly vitrified. The glaze matures, and the cobalt decoration develops its blue.


At Sōta-gama, shelves of ware stood on kiln cars, loaded outside the gas kilns and rolled inside. The arrangement of shelves, supports and pieces is part of the firer’s work.
Heating takes hours, followed by controlled cooling before unloading. The body, glaze, kiln, atmosphere and load determine the schedule.
White and blue-and-white ware may be finished after this firing. Pieces intended for overglaze decoration go on to another painter.
Our Sōta-gama report follows painting, glazing and firing through the workshop, with photographs and short videos of each.
Stage 8: Overglaze color and further firing
Overglaze painting, uwa-etsuke (上絵付け), adds decoration above the fired glaze. The term aka-e (赤絵) is also associated with this work, particularly decoration in which red plays a prominent part.

Near Kami-Arita station, we visited a painter who told us he had spent about seventy years at this work. A small lid turned in his hand beneath the brush. Beside him, finished pieces showed the bright colors that the pale, unfired enamel would become.
He recalled an apprenticeship in which beginners could spend three to five years practicing lines on paper before painting porcelain.
He described firing his enamels at about 800°C. Published Arita guides commonly give roughly 700–800°C for overglaze firing, with the schedule determined by the materials. Metallic decoration may need a separate firing.
Read the visit to his overglaze-painting studio for the brushwork, firing and conversation about the future of his trade.
Stage 9: Inspection, finishing and packing
After the last firing and cooling, the piece is checked for shape, glaze, decoration and fit. Inspection can happen earlier too, before more work is added to a faulty body.
The foot matters as much as the painted surface: it meets your table, and sometimes another dish’s glaze in a stack. Packing protects rims, handles and lids on their way out of the workshop.
How long does it take to make Arita ware?
A roller-forming movement may take seconds. Preparing clay, drying a batch, decorating, firing and cooling take much longer, with time between stages as work passes from one workshop to the next.
That is why a machine-cycle or kiln time cannot tell you how long a finished piece takes. The brief movement in a workshop video belongs to a much longer process.
What the price of Arita ware reflects
By this point, the work behind a plate is easier to see. Clay preparation, design, tooling, forming, decoration and kiln work each ask for different skills. One person may cover several jobs; elsewhere, a team shares a single stage.
Hand-painted detail, a complex shape or extra firings can add time and difficulty. Materials, fuel, production volume and distribution also affect price. Machine forming is part of this craft, too: it changes how a shape is made, while leaving much work around it.

When choosing, ask who made the piece, how it was formed and how its decoration was applied. Those answers make the work easier to appreciate.
The people who will carry the work forward
The overglaze painter told us he had no successor. He spoke about the difficulty of earning a living from work that takes so much time and concentration. In a system built on specialists, one person’s retirement can leave several workshops searching for a skill they depend on.
A University of Nagasaki study published in March 2022 documents the industry’s contraction: its series falls from 184 establishments in 1988 to 67 in 2019. These figures cover Arita town’s ceramics and related manufacturers with at least four employees, so they exclude many small workshops and individual makers.
In a February 2022 interview recorded for that study, an Arita Chamber of Commerce representative said that close to 70% of businesses had no identified successor.
At Kanezen, we also saw younger people on the forming floor. The painter’s experience and those younger workers both matter. The question is how to make a life in this work possible, for the people practicing it now and those who might learn it.
Looking at a finished piece with fresh eyes
Look again at the curve of a rim, the foot beneath a bowl, or a wash of blue gathered beside an outline. The workshops make these details easier to notice.
- Shape: repeated contours and relief can suggest tooling. Throwing marks can be retained deliberately. Neither symmetry nor asymmetry proves a particular forming method.
- Blue decoration: changes in line width and pooled washes may suggest brushwork. Transfers can imitate these effects, so ask how the pattern was applied if it matters to you.
- Overglaze color: a raised enamel or metallic line may be felt above the glaze. A smooth surface does not rule out overglaze work, and touch does not establish washing or heating suitability.
- Foot and fit: examine how the base meets a surface and how a lid sits. These are practical details you will notice every time you use the piece.
For daily use, follow the instructions for the individual piece. Dishwasher, microwave and oven suitability are separate questions. Metallic decoration needs particular care. Our ceramic care guide and guide to porcelain durability cover choosing and caring for everyday tableware.
Six pieces to explore at the table
These pieces come from our wider Arita collection, rather than the workshops visited here. They offer a way to explore the forms and decoration in this guide; we have not verified each piece’s forming method.
Blue on a white ground. The Shochiku-Bai Square Plate and Blue Tokusa Flower Oblong Plate carry hand-painted blue designs across two different outlines.


Blue with warmer colors. The Sometsuke Akae Harmony Bowl brings red, green and yellow accents together with an indigo ground. The Imari Plum Ribbon Donburi combines a vermilion ribbon, white plum blossoms and a blue wave pattern.


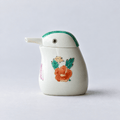
For everyday use. The Kobana Stripe Soy Sauce Dispenser puts bright accents on a small pouring form. The Arita B&W Cups offer a quieter palette in compact, 200 ml cups.


Explore the five workshop reports
- From pottery stone to porcelain clay: Koda Toudo’s refining process.
- Shaping porcelain in plaster molds: casting, releasing and drying the body.
- Roller forming at Kanezen: soft clay becoming repeated round forms.
- Painting, glazing and firing at Sōta-gama: the blue-and-white sequence.
- Overglaze painting in an Arita studio: color after the main firing.
Thank you to everyone who let us watch: the teams at Koda Toudo, the Yamauchi forming workshop, Kanezen and Sōta-gama, and the painter who welcomed us into his studio.
At home, a cup is still a cup. You fill it, lift it and wash it. But the bare ring underneath, the turn of the rim and the blue beneath the glaze now have something to tell you about the people who made it.
Explore our Arita ware collection
Sources and reporting
Written by Jean from the team’s June 2026 visit notes, photographs and video, including reporting by Erika and Kazumi. The five visits show separate workshops, not one plate moving through a continuous production line. Model-making background and industry figures come from the sources below.
- Koda Toudo: manufacturing process (Japanese): cleaning, milling, refining and preparing clay.
- Koda Toudo: Amakusa pottery stone and clay bodies (Japanese): material properties and the range of bodies supplied.
- Saga Ceramics Industry Cooperative: forming methods (Japanese): models, working molds, casting and wheel-based methods.
- Arita Tourism Association: how Arita ware is made (Japanese): production sequence and typical firing temperatures.
- Arita Porcelain Lab: manufacturing process: a producer’s account of bisque, brushwork, glazing and firing.
- Saga ceramics education resource: porcelain production: process material using the Kyushu Ceramic Museum’s workshop footage.
- Kyushu Ceramic Museum: history of Arita ware, published through the Japan Tourism Agency: origins and the changing use of the name Imari.
- Eiji Takeda: Market Research on Arita Tourism and Arita Porcelain, FY2021 report (Japanese, published March 2022; PDF), pp. 279–280 and 300: manufacturing statistics, their coverage and the succession interview.
Methods and firing schedules vary between makers. Craftspeople’s accounts describe their own experience; product details follow the store listings checked during this revision.

Written by Jean
My Japanese World
Jean has lived in Japan for more than 20 years. His passion is to bridge cultures. He runs My Japanese World with his wife, Kazumi, to share Japanese culture and heritage with the world. This guide draws on visit notes and photographs from Erika and Kazumi. Meet the team on our About Us page.
Frequently asked questions
What is Arita ware made of?
Arita ware is porcelain made from a prepared mineral body. Amakusa pottery stone is an important raw material. It is cleaned, milled and refined before being prepared for forming.
How is Arita ware made?
The body is prepared, shaped, finished, dried and bisque fired. Decoration and glazing precede the main firing, cooling and inspection. Overglaze color adds further painting and firing; white porcelain skips the painting stages.
How many times is Arita porcelain fired?
Usually a bisque firing and a main glaze firing, with at least one additional firing for overglaze decoration. Some materials require further firings.
Is Arita ware handmade?
A piece can be cast or machine-formed, finished by hand, then decorated with a brush, transfer or another method. “Hand-thrown” and “hand-painted” identify particular stages more clearly than “handmade.”
Is Arita ware the same as Imari ware?
The names overlap historically because Arita porcelain was shipped through Imari port. Imari can also identify modern work made in Imari or a decorative tradition. Check the maker and place of production.
How long does Arita ware take to make?
Timing depends on the piece, batch and workshops involved. Drying, decoration, preparation and cooling all add to the time spent forming and firing it.
Why do prices vary so much?
Materials, design, tooling, production scale, decoration, firings and distribution all contribute. Hand-painted detail or complex forms can add considerable work.
Can Arita ware be used every day?
Many pieces are made for daily use. Follow the individual maker’s dishwasher, microwave and oven instructions, particularly for metallic decoration.